This week, I dove into Python’s object-oriented programming (OOP) concepts, and what a journey! From creating custom classes to understanding how functions can manipulate objects, I felt like I was building tiny software factories.
In this assignment, I explored how to define and manipulate Python classes by building a ‘Rectangle’ object from scratch. I created helper functions that allowed me to generate rectangles, convert them into readable strings, shift their position, and create offset versions. This exercise helped me understand not only how object-oriented programming (OOP) works in Python, but also how functions and classes can work together to build reusable, flexible tools. Along the way, I encountered a classic beginner’s mistake: referencing a class before defining it. I learned a valuable lesson about the importance of structure in Python. Below, I’ll walk through the code I wrote, the functions I implemented, and the output that confirmed everything was working smoothly.
###### Step 1: Define the Point class (Very important, I will show later why)
class Point:
###### Represents a point in 2D space
def __init__(self, x=0, y=0):
self.x = x
self.y = y
def __str__(self):
return f"({self.x}, {self.y})"
###### Step 2: Define the Rectangle class
class Rectangle:
###### A class to manufacture rectangle objects.
def __init__(self, posn, w, h):
###### Initialize rectangle at posn, with width w, height h.
self.corner = posn
self.width = w
self.height = h
def __str__(self):
return "({0}, {1}, {2})".format(self.corner, self.width, self.height)
##### Step 3: Create the helper functions
def create_rectangle(x, y, width, height):
##### Create and return a new Rectangle instance from x, y, width, height.
return Rectangle(Point(x, y), width, height)
def str_rectangle(rect):
##### Return a string in the form (x, y, width, height).
return f"({rect.corner.x}, {rect.corner.y}, {rect.width}, {rect.height})"
def shift_rectangle(rect, dx, dy):
##### Shift the rectangle's position by dx and dy.
rect.corner.x += dx
rect.corner.y += dy
def offset_rectangle(rect, dx, dy):
##### Return a new Rectangle offset from the original by dx and dy.
return Rectangle(Point(rect.corner.x + dx, rect.corner.y + dy), rect.width, rect.height)
# Step 4: Test the functions
# Testing the assignment logic
r1 = create_rectangle(10, 20, 30, 40)
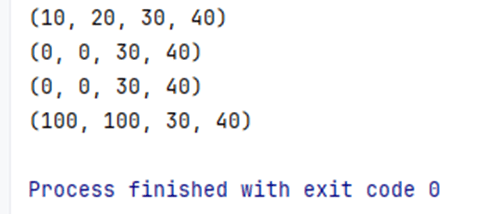
print(str_rectangle(r1)) # Expected: (10, 20, 30, 40)
shift_rectangle(r1, -10, -20)
print(str_rectangle(r1)) # Expected: (0, 0, 30, 40)
r2 = offset_rectangle(r1, 100, 100)
print(str_rectangle(r1)) # Should still be: (0, 0, 30, 40)
print(str_rectangle(r2)) # Expected: (100, 100, 30, 40)
Result
Lesson Learned: The Missing Piece
At the beginning, when I tried to create a rectangle using:
box = Rectangle(Point(0, 0), 100, 200)
Python gave me this error:

At first, I was confused. But then I realized: The class point was never defined! I needed a class that would represent the x and y coordinates of the rectangle’s corners. Once I added it, everything fell into place.
Final Thoughts
I appreciated this assignment because it helped me think more systematically, understand dependencies within my code, and approach debugging with a curious mindset. Identifying and resolving the missing Class point highlighted the importance of understanding the underlying structure of object-oriented programming. As I continue this learning journey, I look forward to exploring new concepts, experimenting with code, and improving my skills, one function, one class, and one challenge at a time.
